If you plan to update or redeploy your subgraph in the future, create and use a tag before you start querying the endpoint.
Tags let you hot-swap new deployments under the same URL later without changing your front-end code.
Before you start
There are important differences between providers. Not all subgraph hosting services follow the same conventions.Because of this, one-click migration may fail in certain cases. Here are the two main things to check:
#1. Different IPFS gateways
Some providers use private IPFS nodes instead of the default public gateway. For example:| Provider | Typical IPFS Gateway |
|---|---|
| The Graph Hosted Service | https://ipfs.network.thegraph.com |
| Alchemy Subgraphs (before shutdown) | https://ipfs.satsuma.xyz/ipfs/ |
| Chainstack Subgraphs (before shutdown) | https://ipfs-graph.p2pify.com/ |
Solution
Use the Custom IPFS Gateway field in the migration form, and enter the gateway used by the previous provider.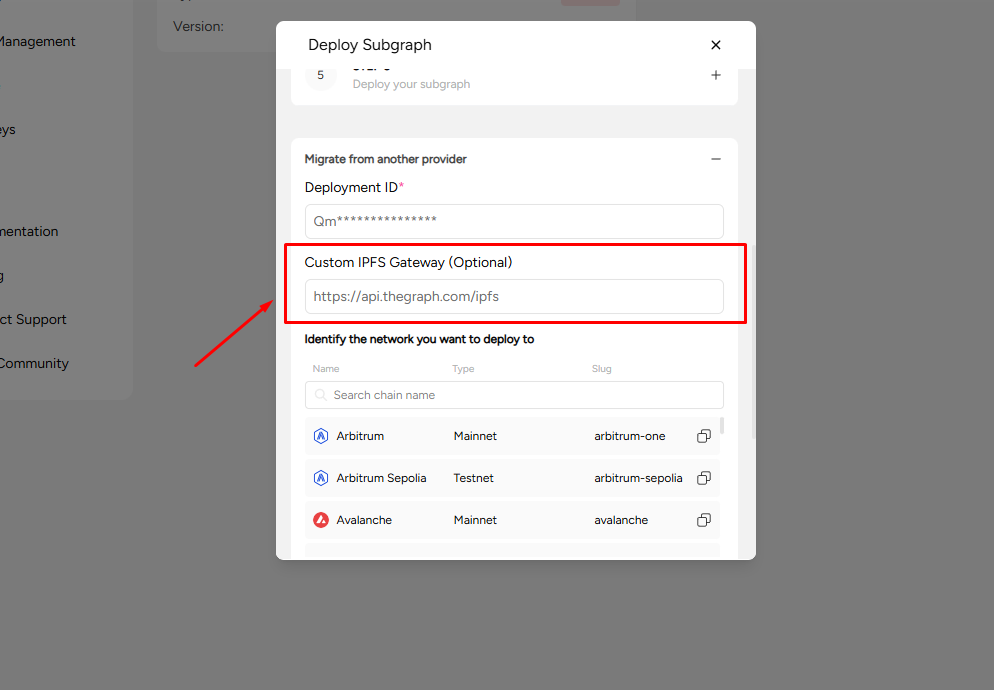
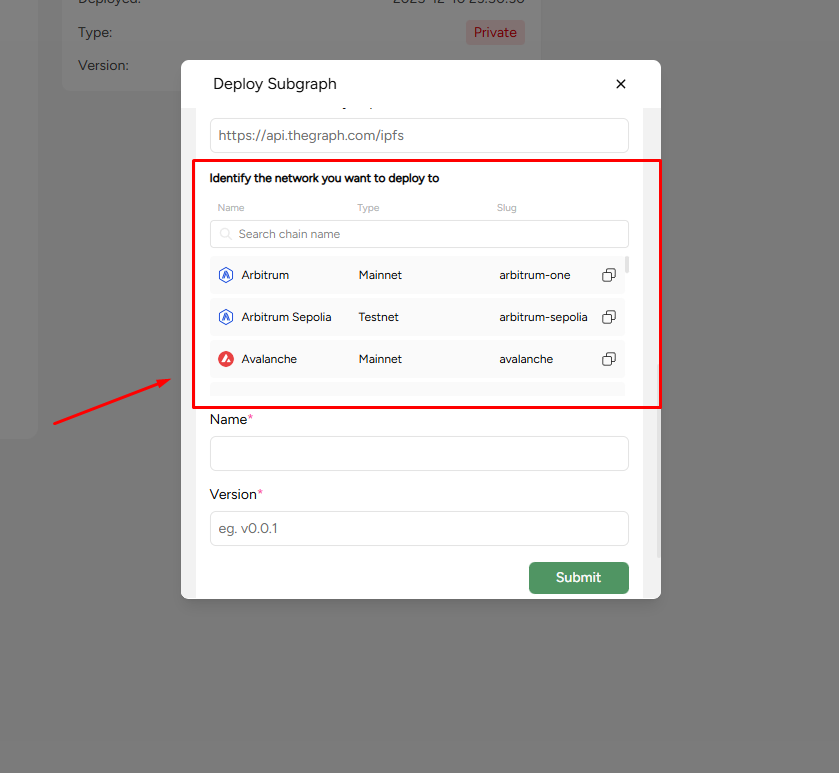
#2. Different network naming conventions
Subgraph hosting platforms sometimes label the same chain differently:| Chain | Possible Provider Names |
|---|---|
| Polygon | matic, polygon |
| Gnosis Chain | xdai, gnosis |
| Base | base, base-mainnet |
| Ethereum | mainnet, ethereum |
Solution
subgraph.yaml to match Ormi’s expected chain ID.
We recommend this if your migration errors mention:
- invalid network
- mismatch in chain ID
- unsupported network name
Getting started
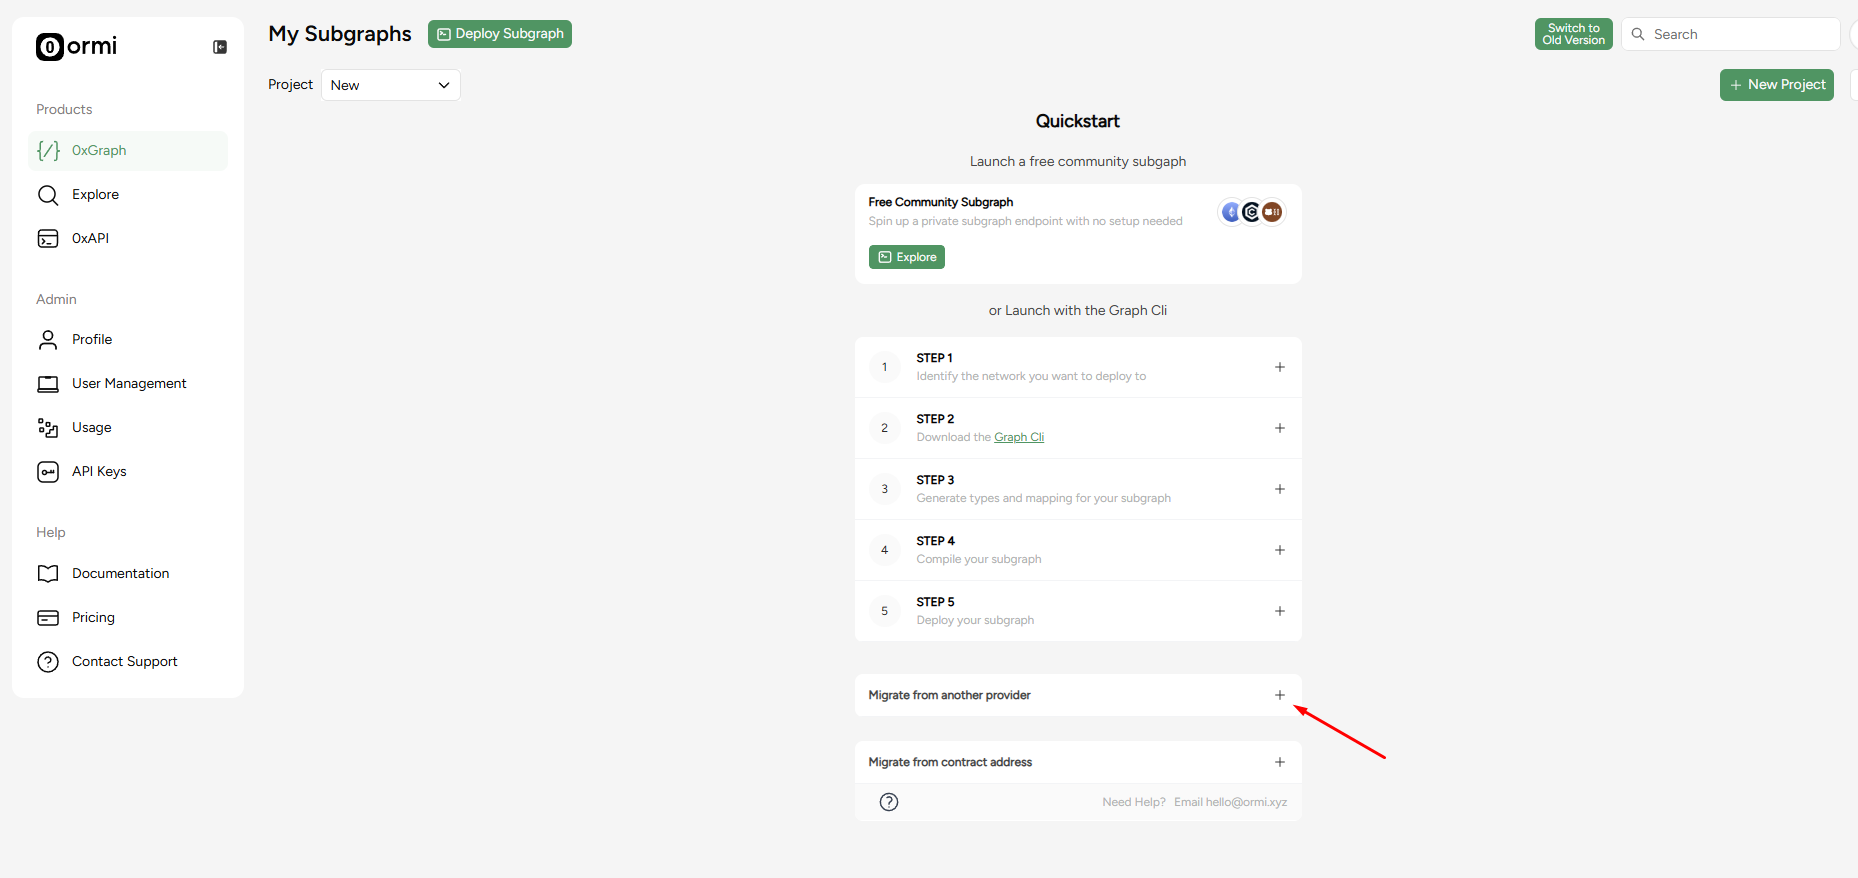
- In the Ormi dashboard, click 0xGraph
- Expand the Migrate from another provider section
How to find the deployment ID using The Graph Explorer

Find the subgraph you want to migrate and copy the deployment ID
In this guide, we’ll be migrating Uniswap v4 on Base Chain from TheGraph.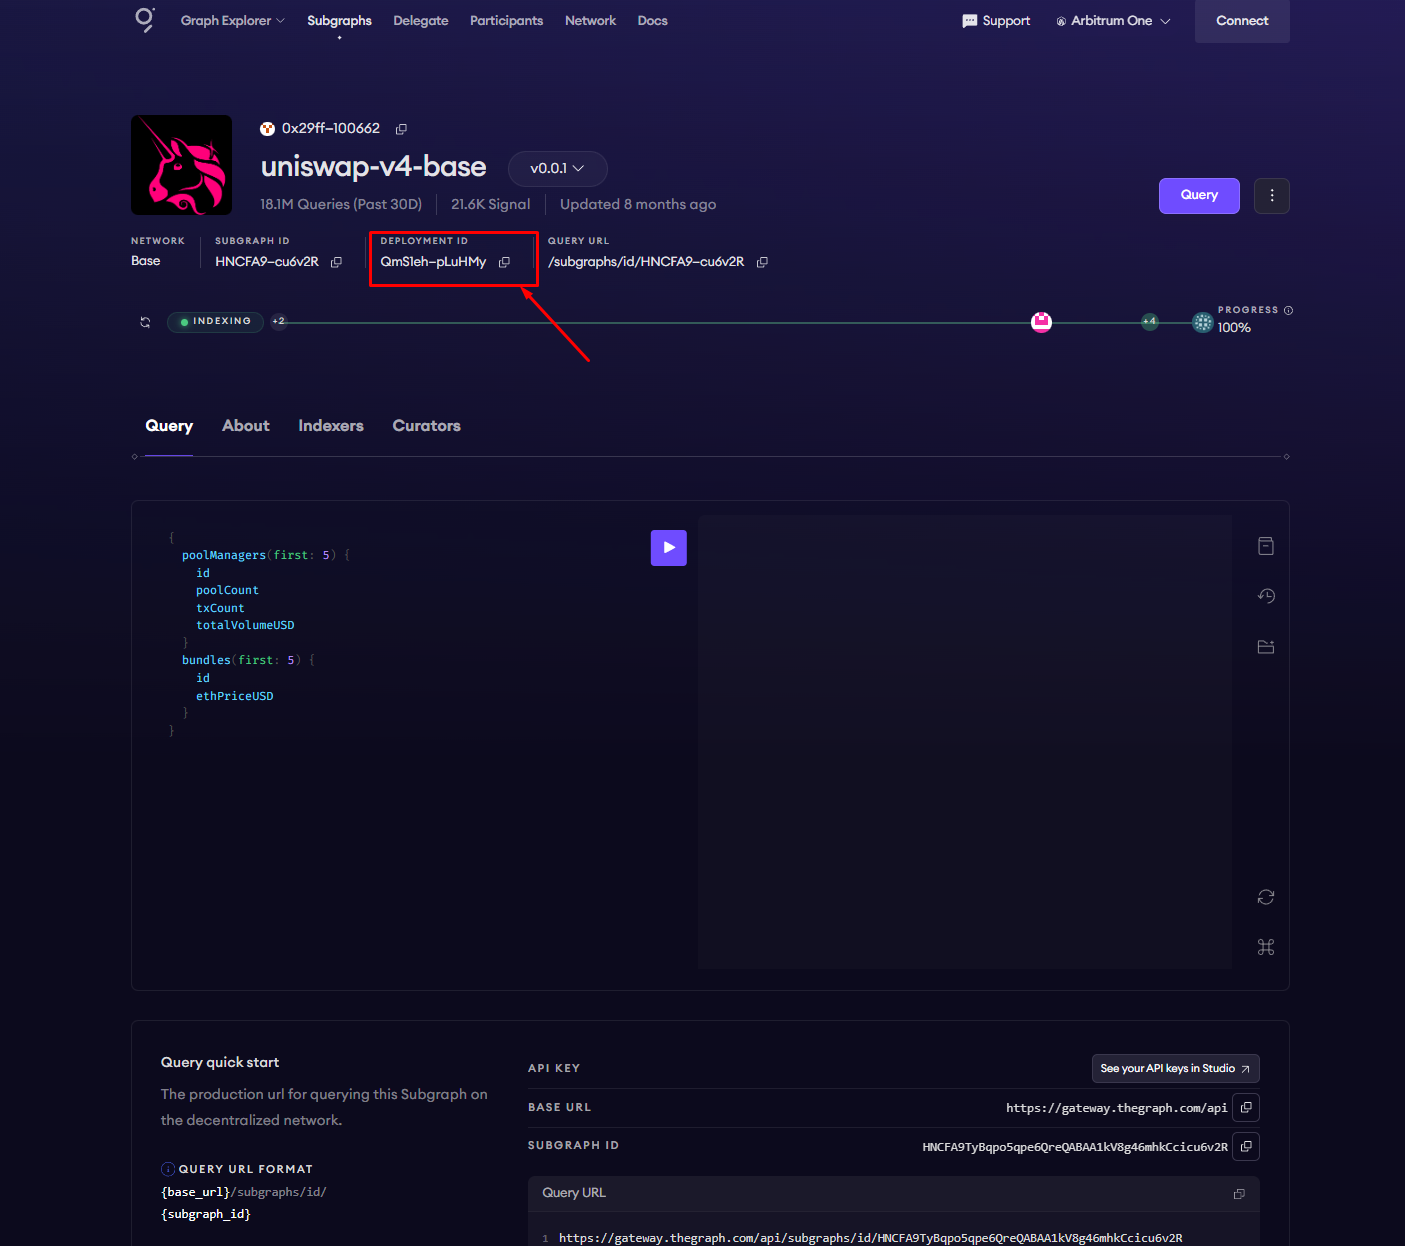
Head back to the 0xGraph page
Complete the required fields in the Migrate from another provider section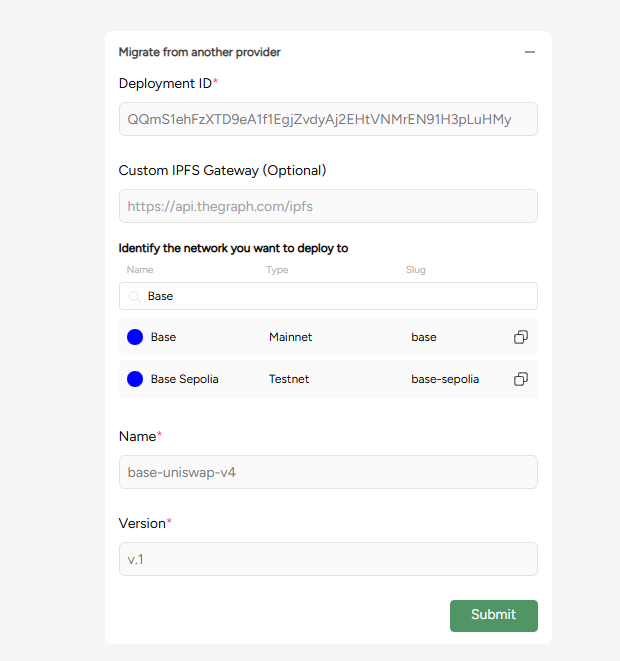
- Deployment ID: QQmS1ehFzXTD9eA1f1EgjZvdyAj2EHtVNMrEN91H3pLuHMy
- Network: Base
- Name: base-uniswap-v4
- Version: v.1
If migration fails
If you run into errors during migration, it is usually caused by either:- A private IPFS gateway used by the original provider
- A network naming mismatch
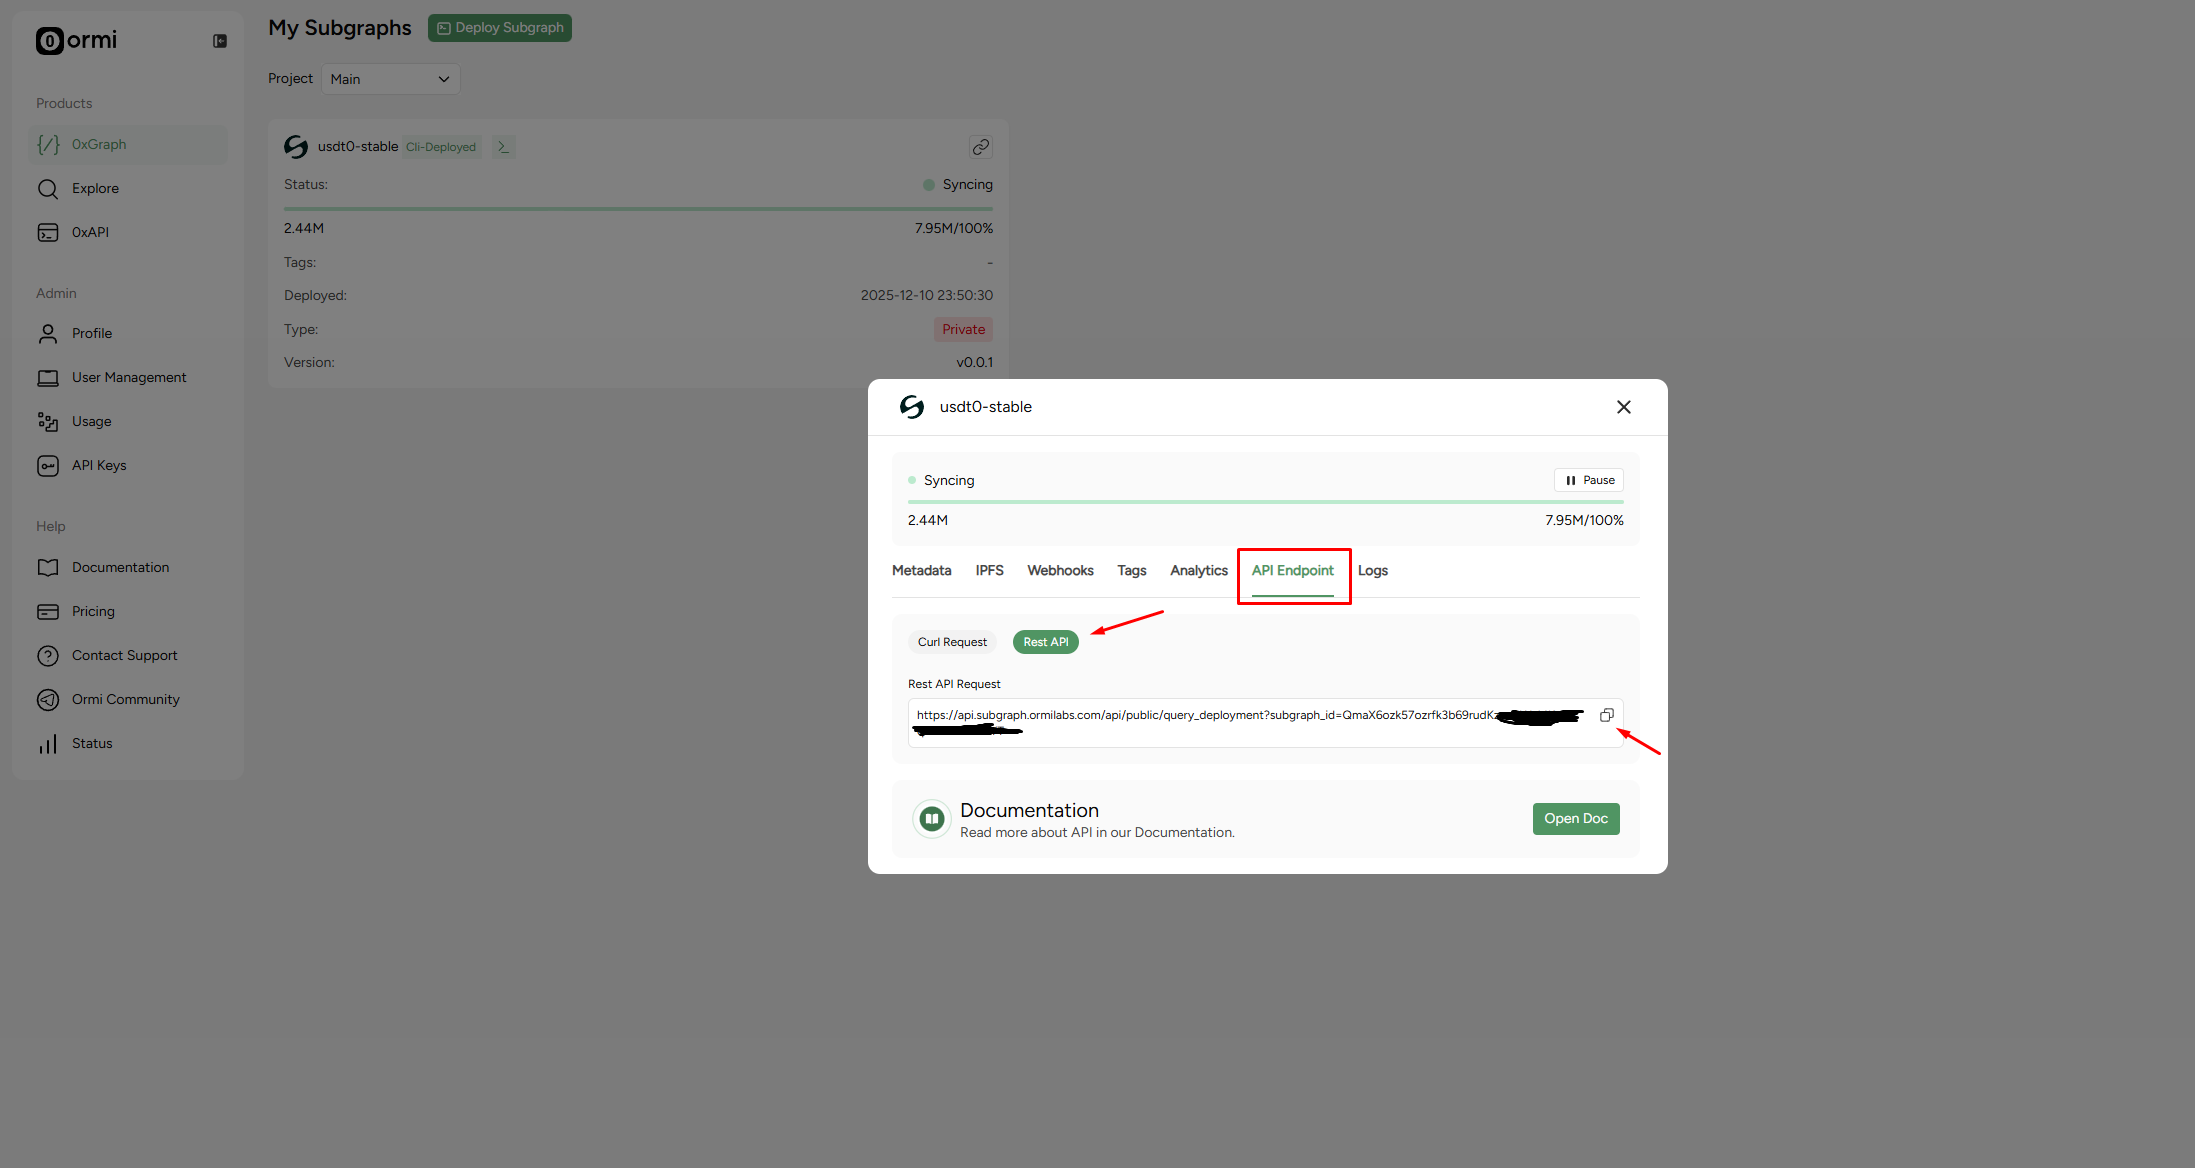
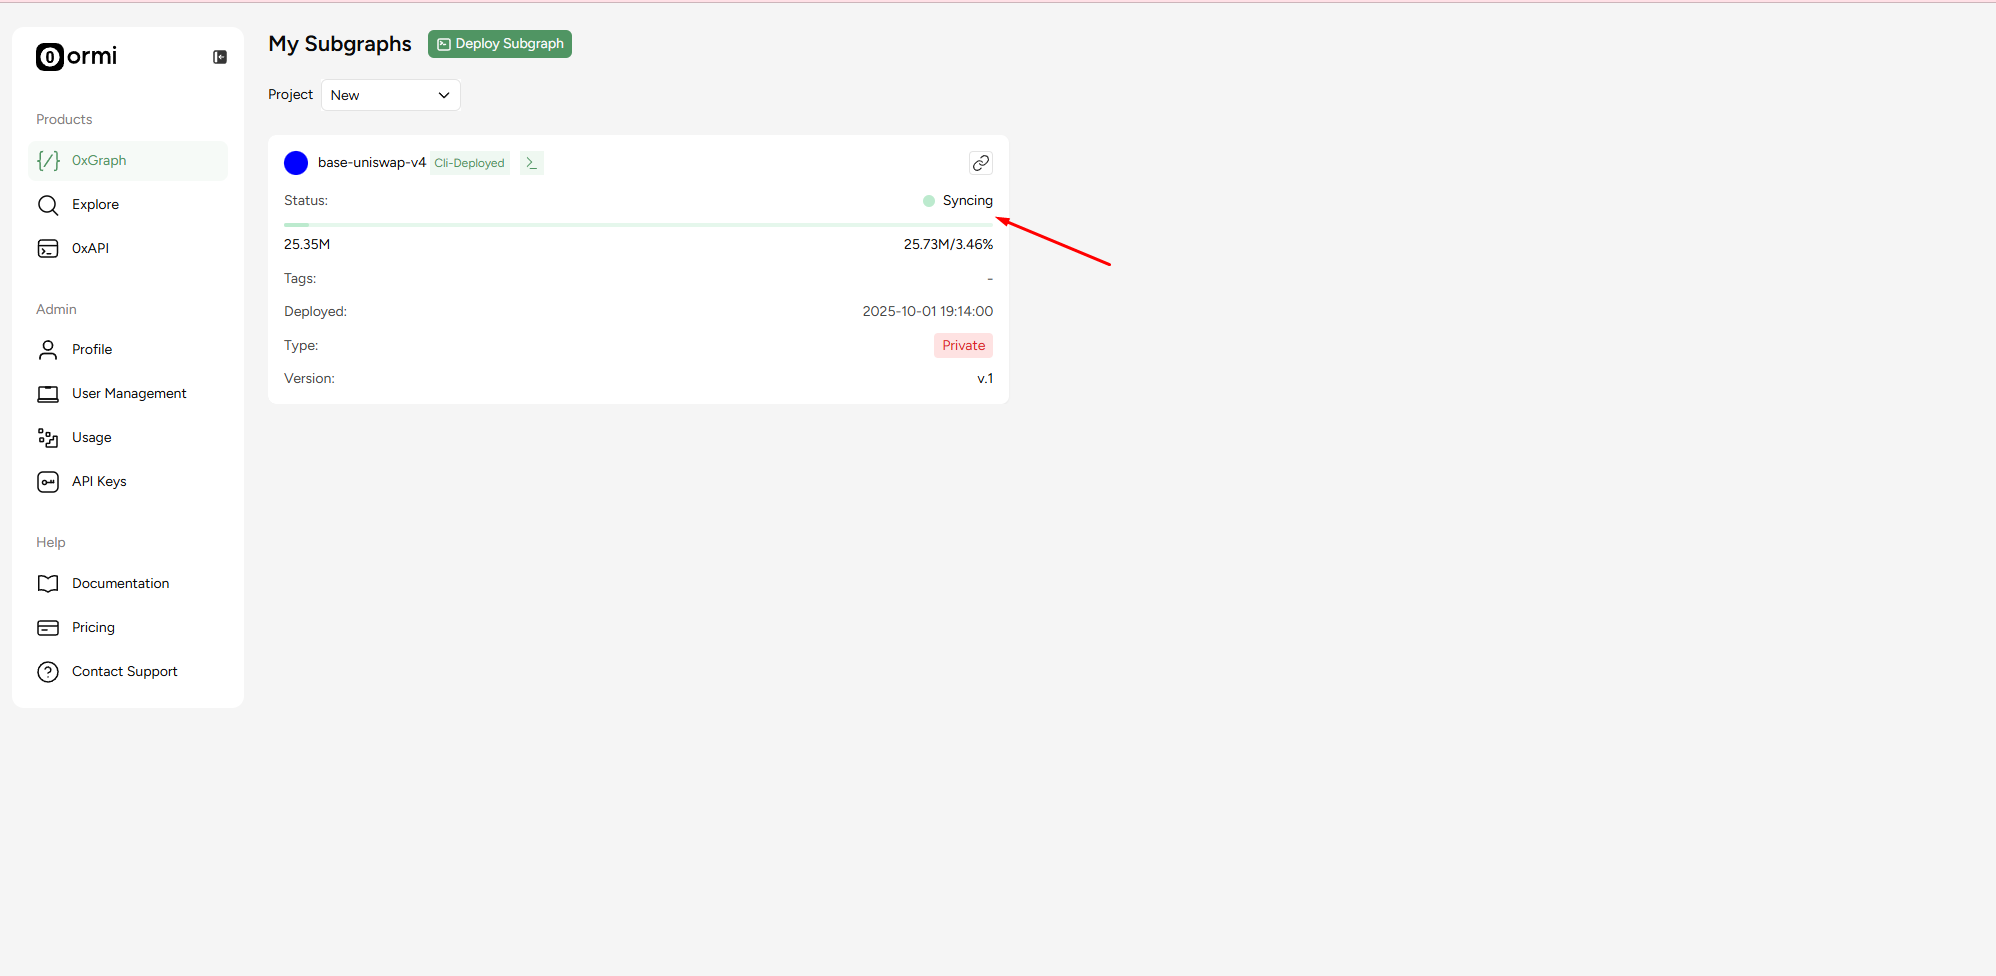
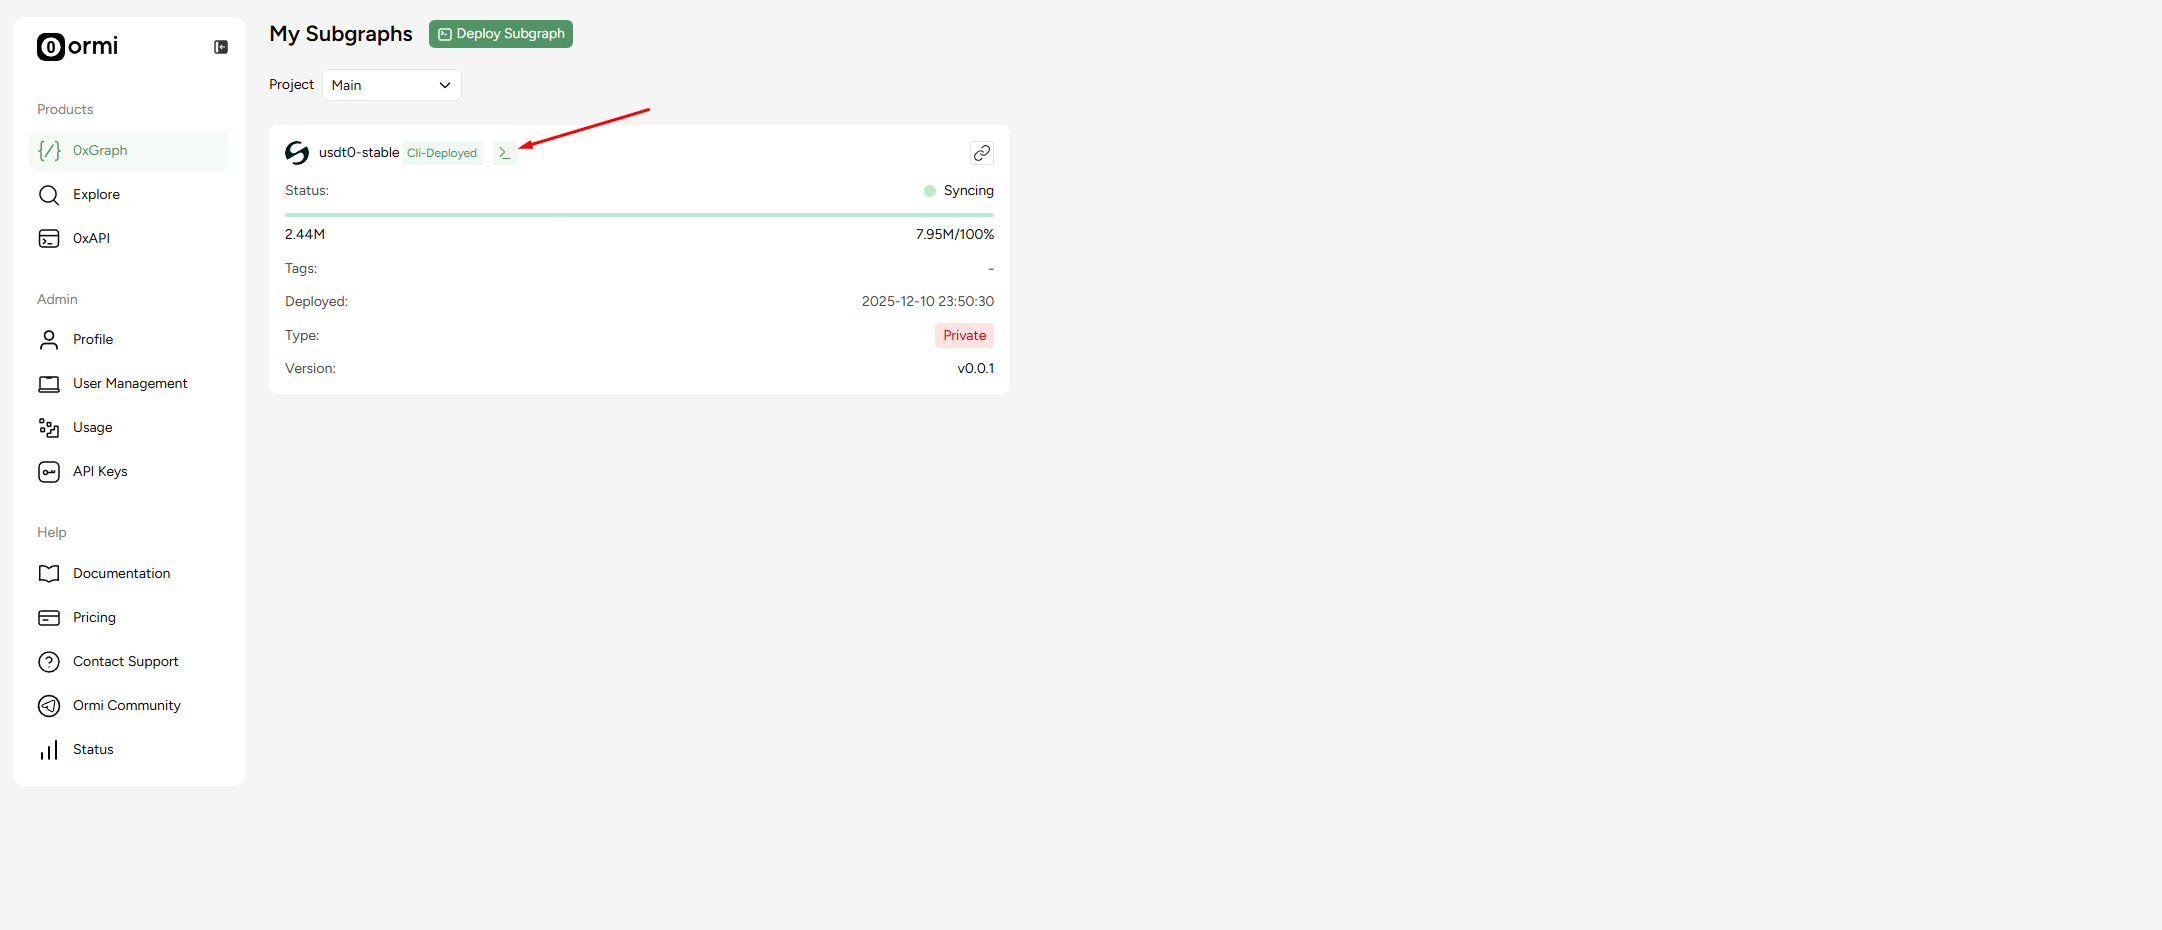
How to access your Subgraph endpoint
Step #1: Click on the >_ icon
Next steps
- Click on API Endpoint
- Press Rest API
- Copy URL